Caution
This is the documentation for the current development branch of the CometVisu. It is possible that some of the described features are not yet available in the current release.
Also there might be lots of errors in this documentation as some parts of the content have been translated by an online translation service.
The Page widget
Description
Creates a new sub page and adds a corresponding link to the current page.
Settings
For a general understanding of how the configuration files are structured and what elements and attributes are it is recommended to read this section first: Basics.
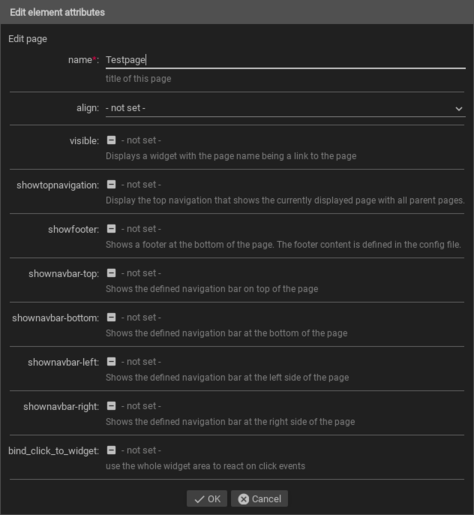
The behaviour and appearance of the Page widget can be influenced by using certain attributes and elements. The following tables show the allowed attributes and elements and their possible values. The screenshots show, how both can be edited in the editor.
Attributes underlined by ….. are mandatory, all the others are optional and be omitted.
Allowed attributes in the Page-element
Element |
Attribute |
|||
|---|---|---|---|---|
Name |
Content |
Description |
||
page |
name |
string |
title of this page |
|
flavour |
string |
Selection of a display variant. See also Flavour. |
||
align |
left, right or center |
|||
ga |
string |
Address to switch to this page by sending a bus message. |
||
transform |
string |
Transformation of the bus system value to be shown. |
||
clients |
string |
Filter with all clientIDs where this GA applies. Comma separated list. |
||
visible |
true or false |
Displays a widget with the page name being a link to the page |
||
type |
text, 2d or 3d |
|||
size |
fixed, scaled or contained |
|||
backdropalign |
string |
|||
backdrop |
anyURI |
|||
showtopnavigation |
true or false |
Display the top navigation that shows the currently displayed page with all parent pages. |
||
showfooter |
true or false |
Shows a footer at the bottom of the page. The footer content is defined in the config file. |
||
shownavbar-top |
true or false |
Shows the defined navigation bar on top of the page |
||
shownavbar-bottom |
true or false |
Shows the defined navigation bar at the bottom of the page |
||
shownavbar-left |
true or false |
Shows the defined navigation bar at the left side of the page |
||
shownavbar-right |
true or false |
Shows the defined navigation bar at the right side of the page |
||
bind_click_to_widget |
true or false |
use the whole widget area to react on click events |
||

2D pages
At 2D pages it is possible to freely position the widgets on the page as well as use a background image. A typical use case is a floor plan as backdrop where in each room the relevant widgets are positioned accordingly.
Background image
The size of the background in relation to the browser window is controlled
by the attribute size. The following holds:
backdropalign can move the position of the background
image. By default it is centered, which is the same as a value of 50% 50%.0px 50% would place it on the left side but vertical centered and
0px 0px would place it on the left and top of the page.Widgets
For the widgets it is important to set the x and y attributes of its
layout element. These values must have a CSS unit. Typical would be a
value like 12% for a relative position and 123px for an absolute
position in pixel.
Tip
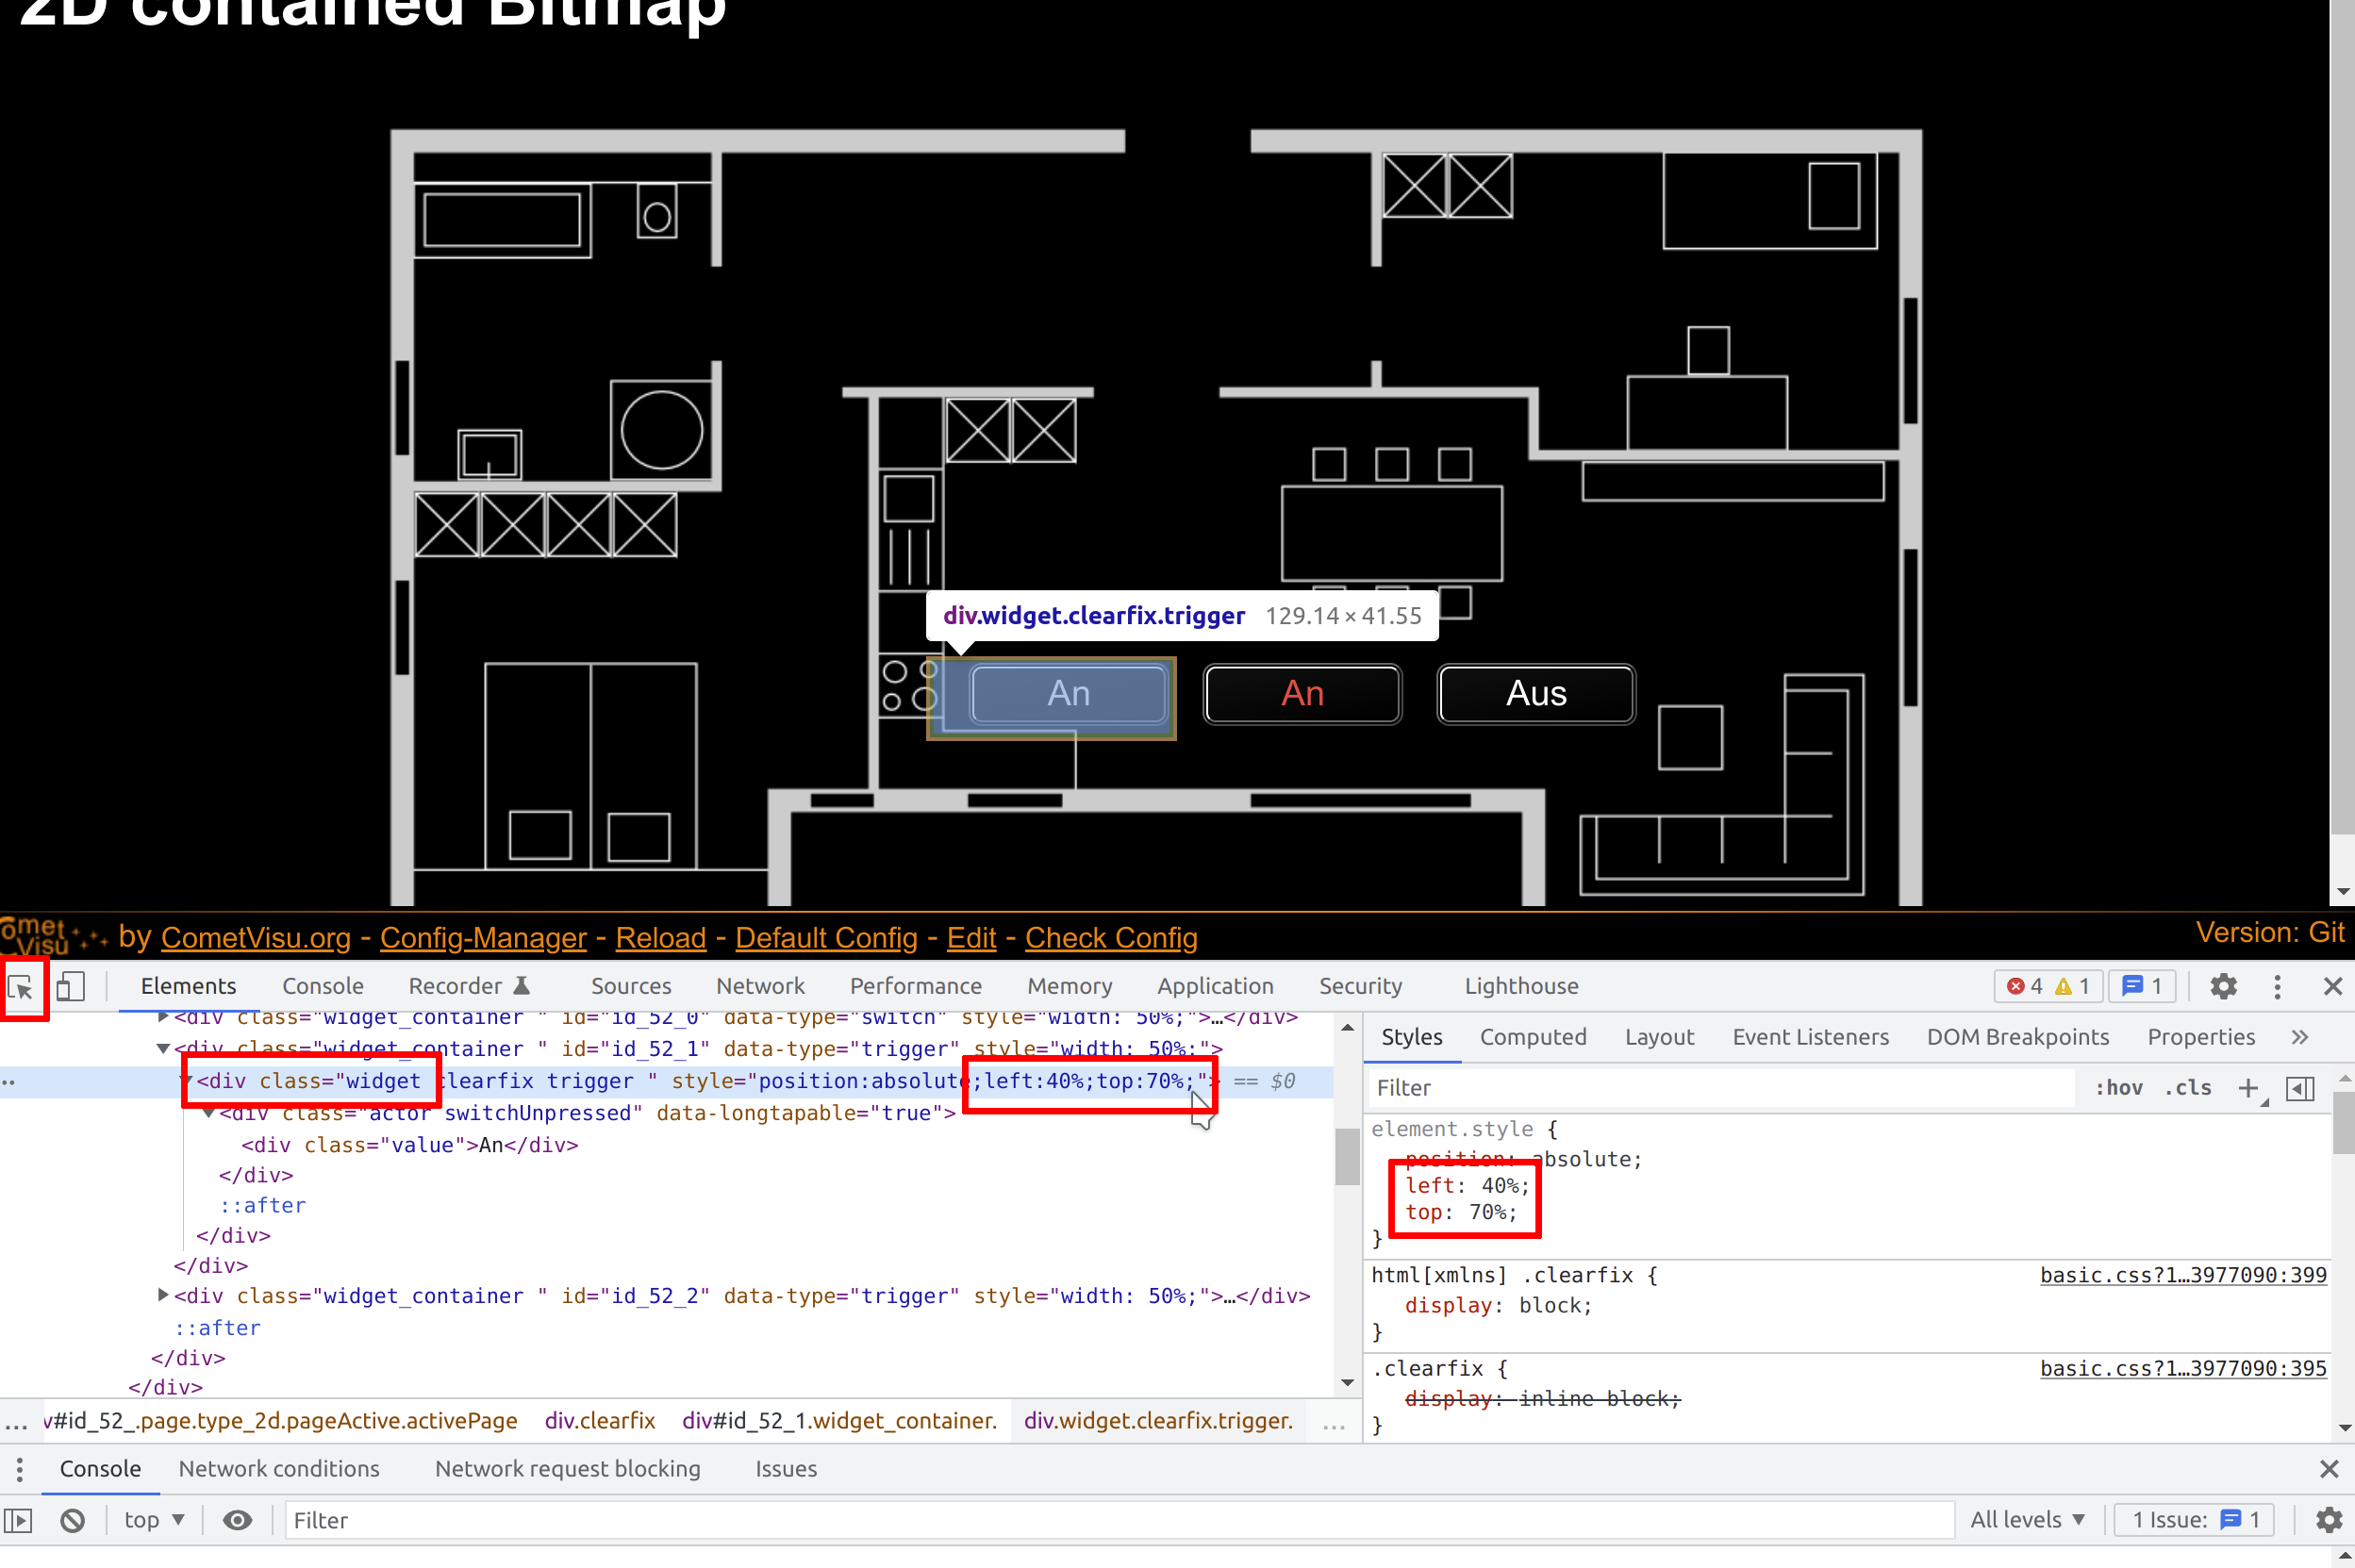
To figure out the optimal value for the position it is possible to use the development mode of the modern browsers: this mode is activated by pressing ctrl + shift + i.
First the widget must be roughly positioned in the config file, then this
config must be opened in the browser where the development mode must be
activated. Then the “box with cursor” must be clicked followed by a click
on the widget of interest in the browser window itself. This widget is now
shown in the DOM tree. Probably it is necessary to go a few levels up there
so that in the end the line with <div class="widget ... is selected.
There you can see at the style attribute the values set in the config
file for left and top.
These values can be changed now (most easily in the right part of the
window in the “styles” section). These changes are immediately shown in the
browser window. The determined value must then be transferred to the config
file to make them persistent.

Bus initiated page switch
Communication
When the attribute ga is set to a bus address, a bus message to that
address can switch the displayed page to this page.
When only ga is set, the change will happen when a 1 (KNX: with DPT:1
or DPT:5) is sent.
When the attribute transform is set, the address in the ga attribute
is interpreted accordingly.
Warning
The use of ga without transform is deprecated and will not work in
future versions.
Client selection
To define the value for the page switch or to limit the switching to select
clients the attribute clients is used. It’s content is a (comma separated)
list of client ID with colon and the trigger value.
The wildcard * can be used for multiple client IDs that start with the
same text.
Examples:
clients="*:1"Every client (also those without a client ID) will switch when a
1is sent.
clients="floor_ground"Only visu
floor_groundis reacting, a1must be sent.
clients="floor_1st:0"Only visu
floor_groundis reacting, a0must be sent.
clients="floor_basement:0, floor_ground:1"Visu
floor_basementreacts when a0is sent,floor_groundreacts when to the same address a1is sent.
clients="floor_*"orclients="floor_*:1"Every client starting with
floor_(like e.g.floor_basementandfloor_ground) is reacting when1is sent.
A possible use case would be wall mounted touch panel PCs that should switch
to the page with the external camera view when the door bell gets rung (the
page with the camera view would then use clients=floor_*:1" to make all
visu clients in the floors switch to this page when to the address in ga
a 1 is sent, but others, like smart phones, are not).
Also common is a use case where by opening the front door the visu next to
it (selected by clients="floor_ground:1") should show the locking state of
all windows so that when you leave the house you can see that everything is safe.
Allowed child-elements and their attributes
All widgets are allowed in the page widget.
Examples
It is possible to manually edit the visu_config.xml and add an entry for the Page widget.
Caution
Make sure that you only use UTF-8 encoded characters by settings the encoding in your XML-editor to UTF-8 mode!
Footnotes